Precast
Precast Septic Tanks in Prescott, AZ
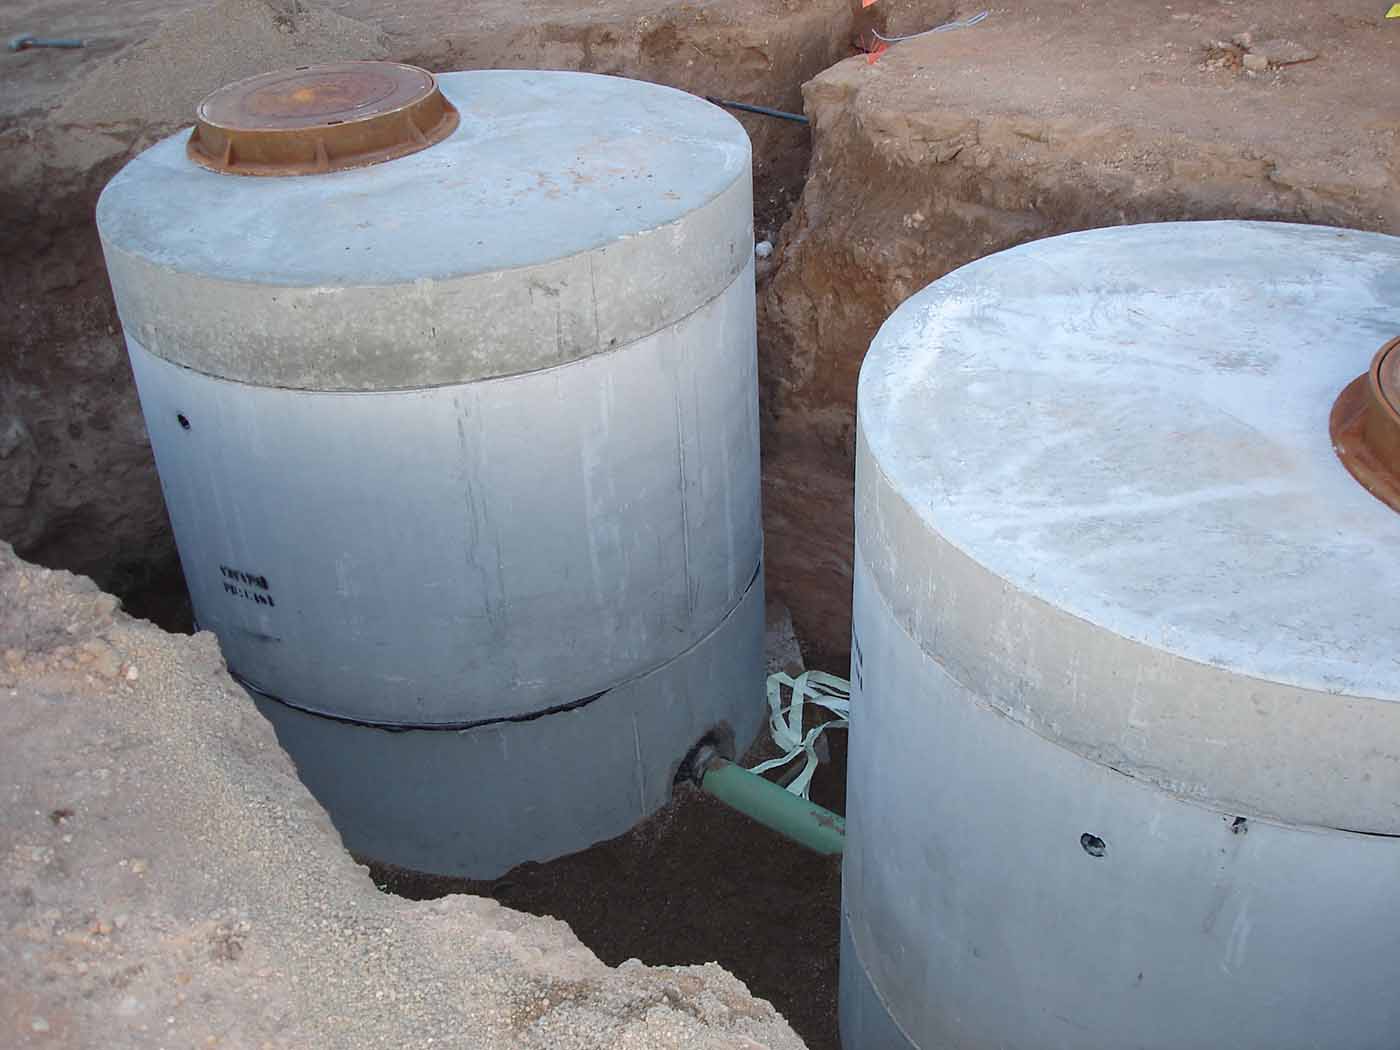
Our septic tanks are structurally sound, watertight, and manufactured to industry-quality standards. Whether for residential projects or commercial construction, precast concrete is the material of choice for on-site wastewater treatment systems.
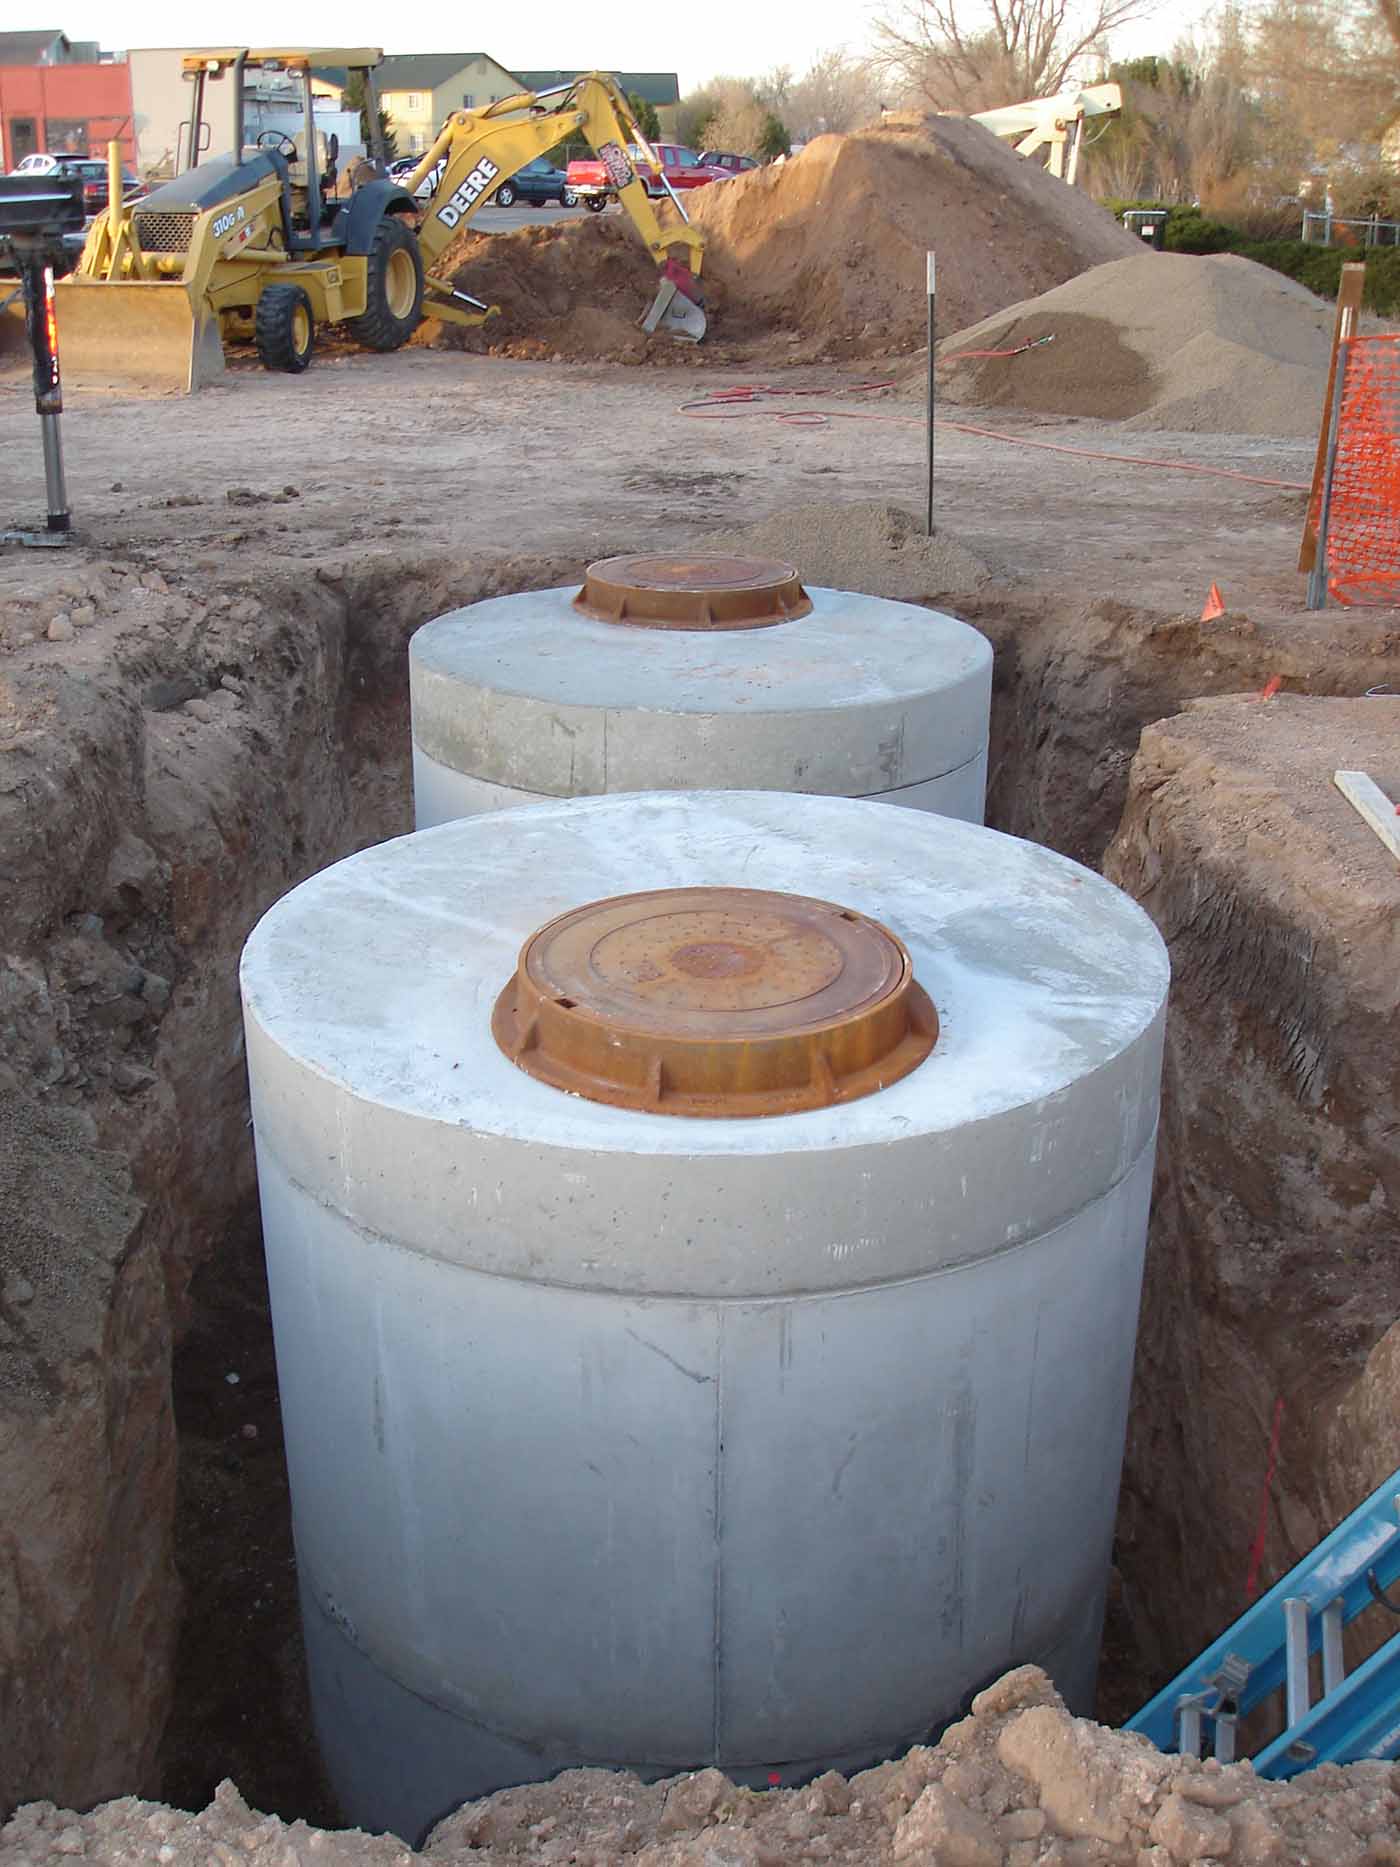
Why Precast Concrete for On-Site Wastewater Tanks?
- Strength increases over time
- Weight helps resist bouyant forces
- Durability
- Ease of Installation
- Low susceptibility to damage during backfill
- Environmentally sound
- Watertight when produced according to industry standards
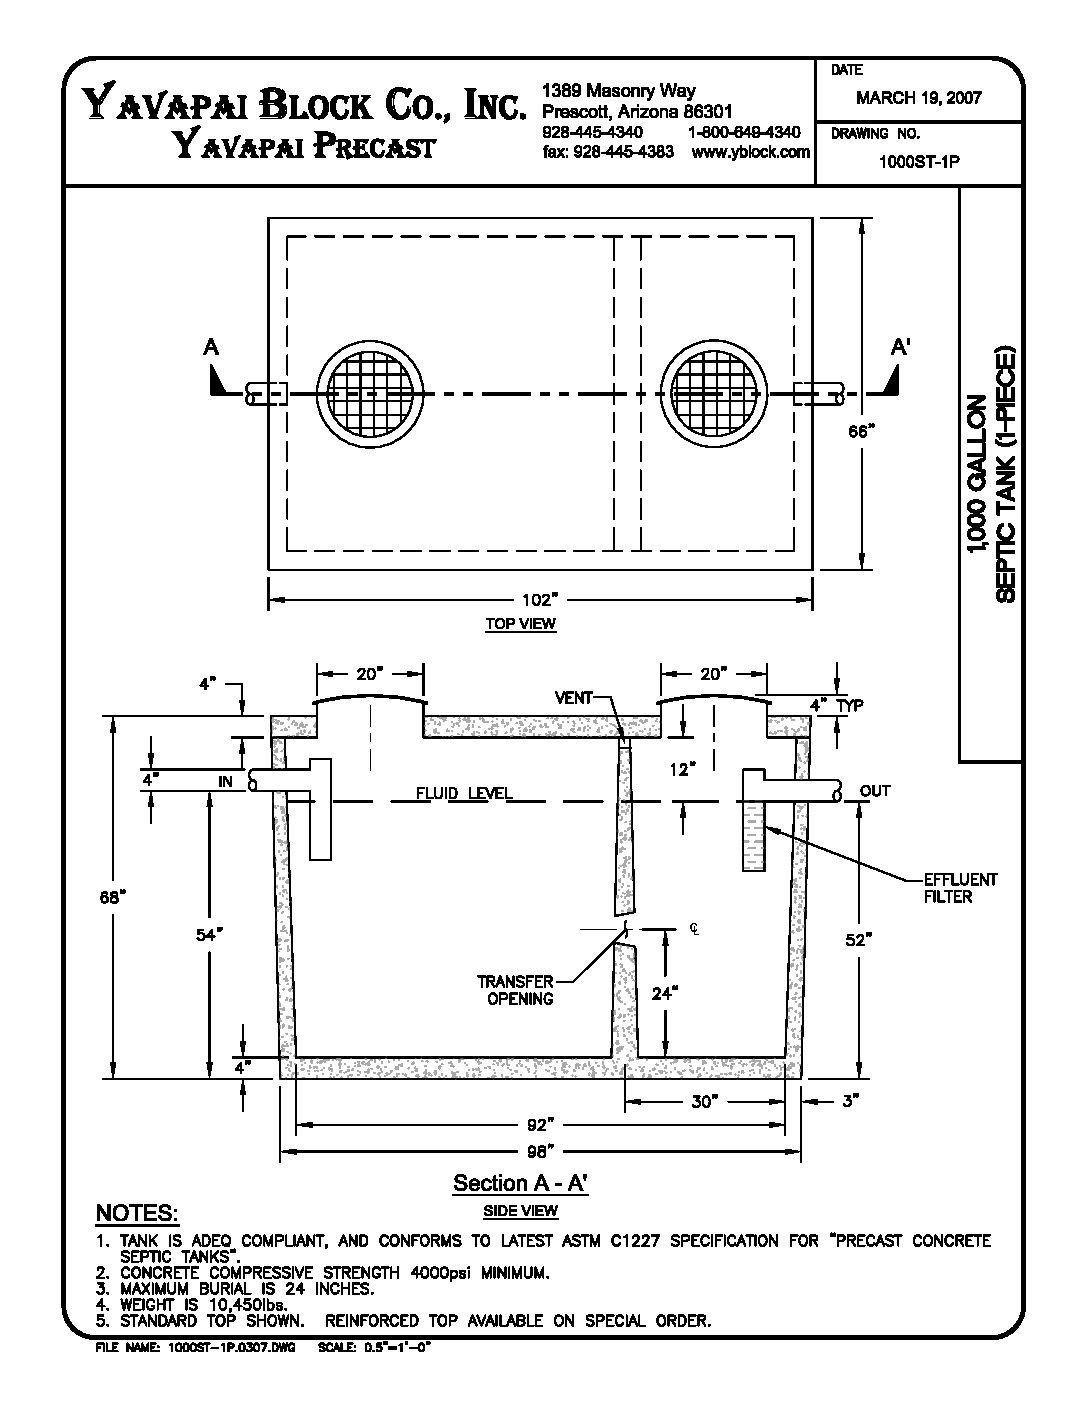
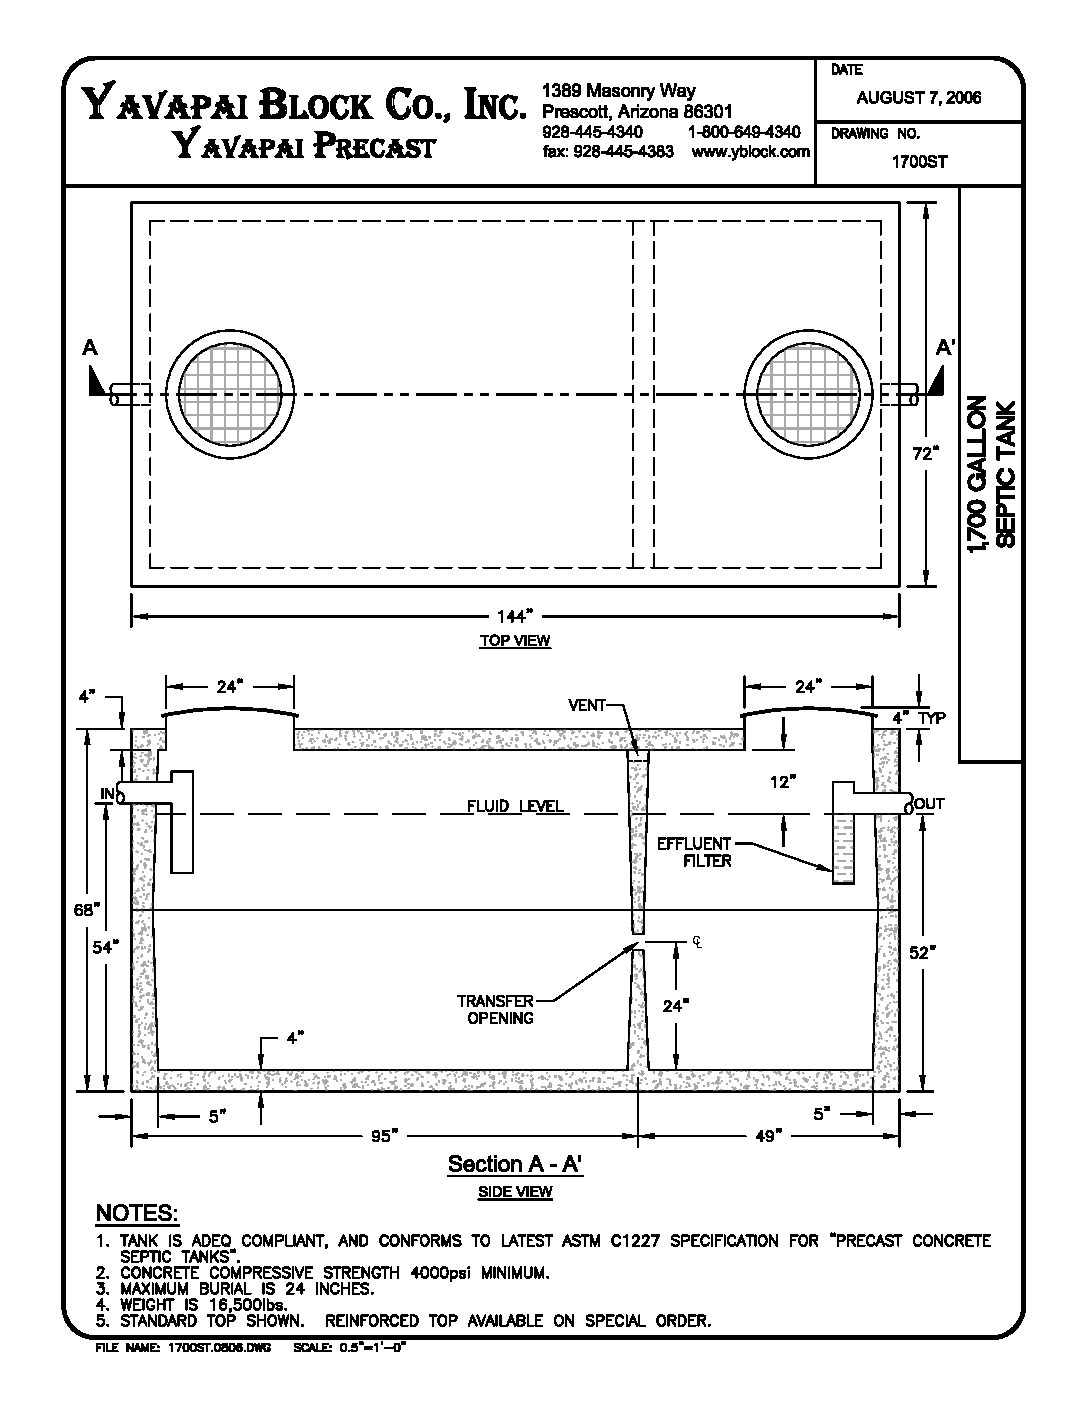
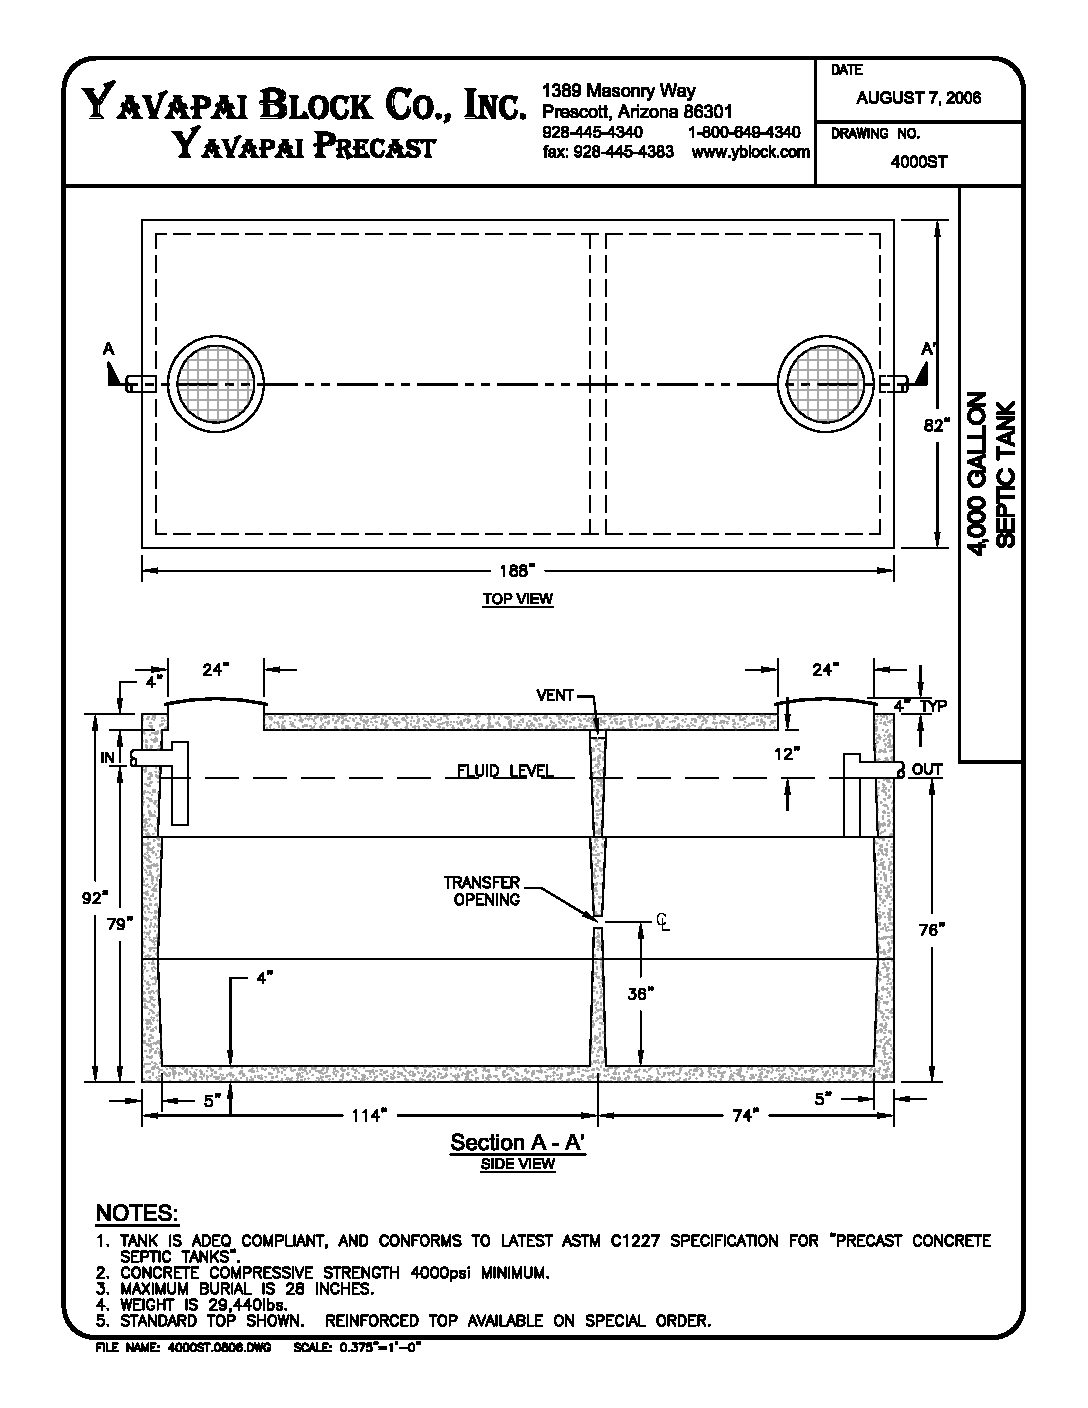
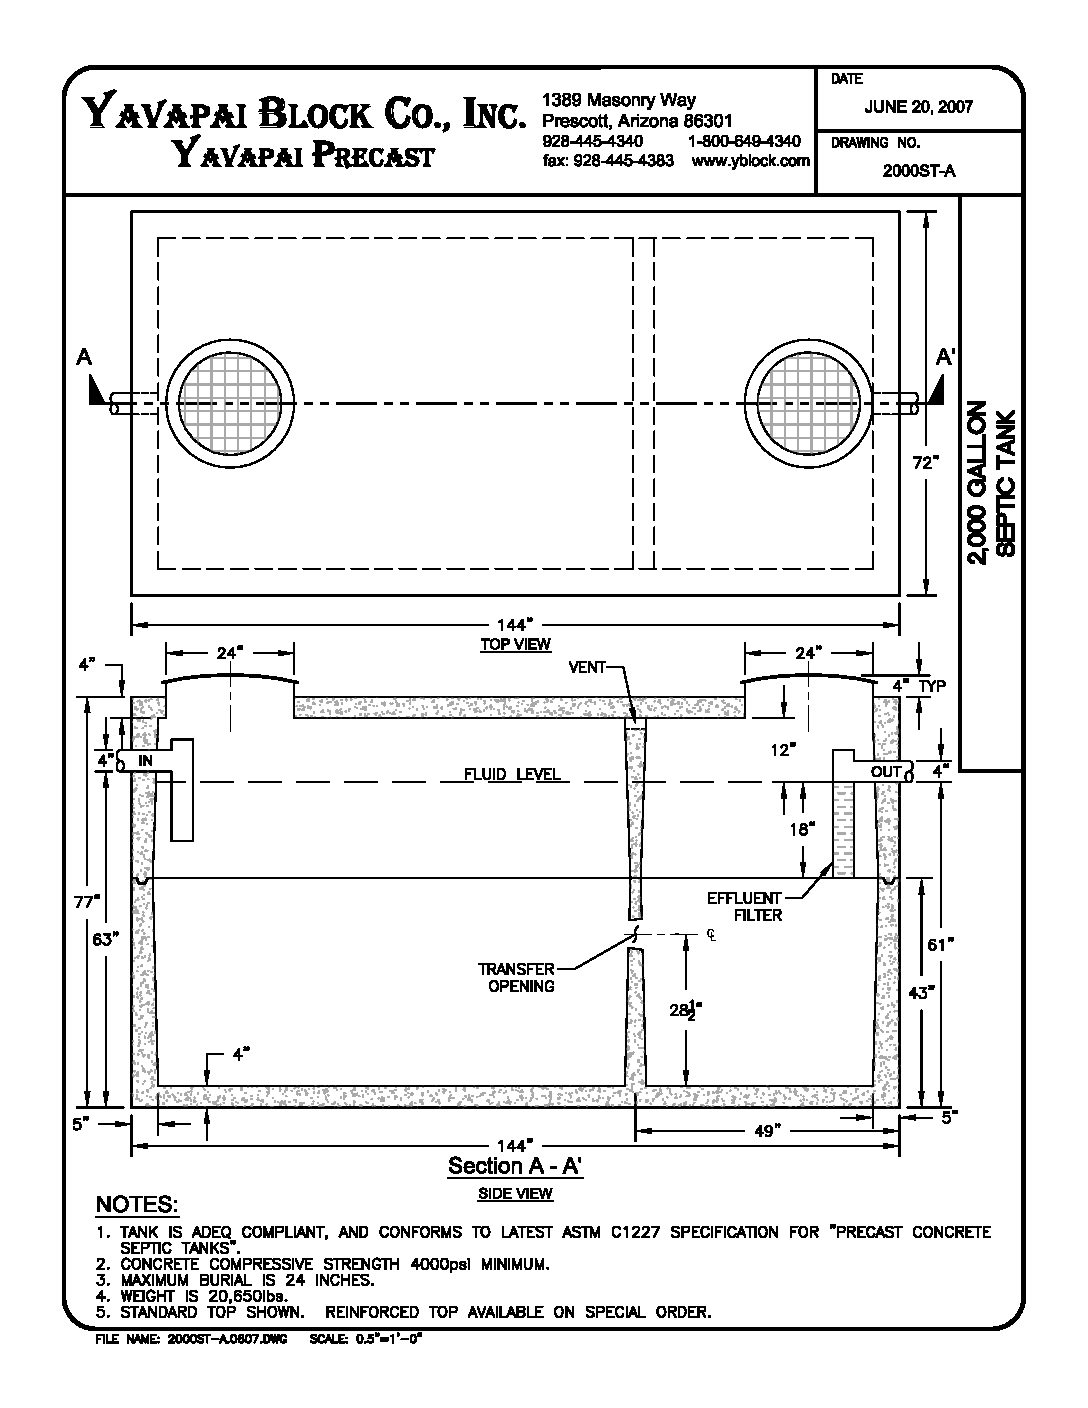
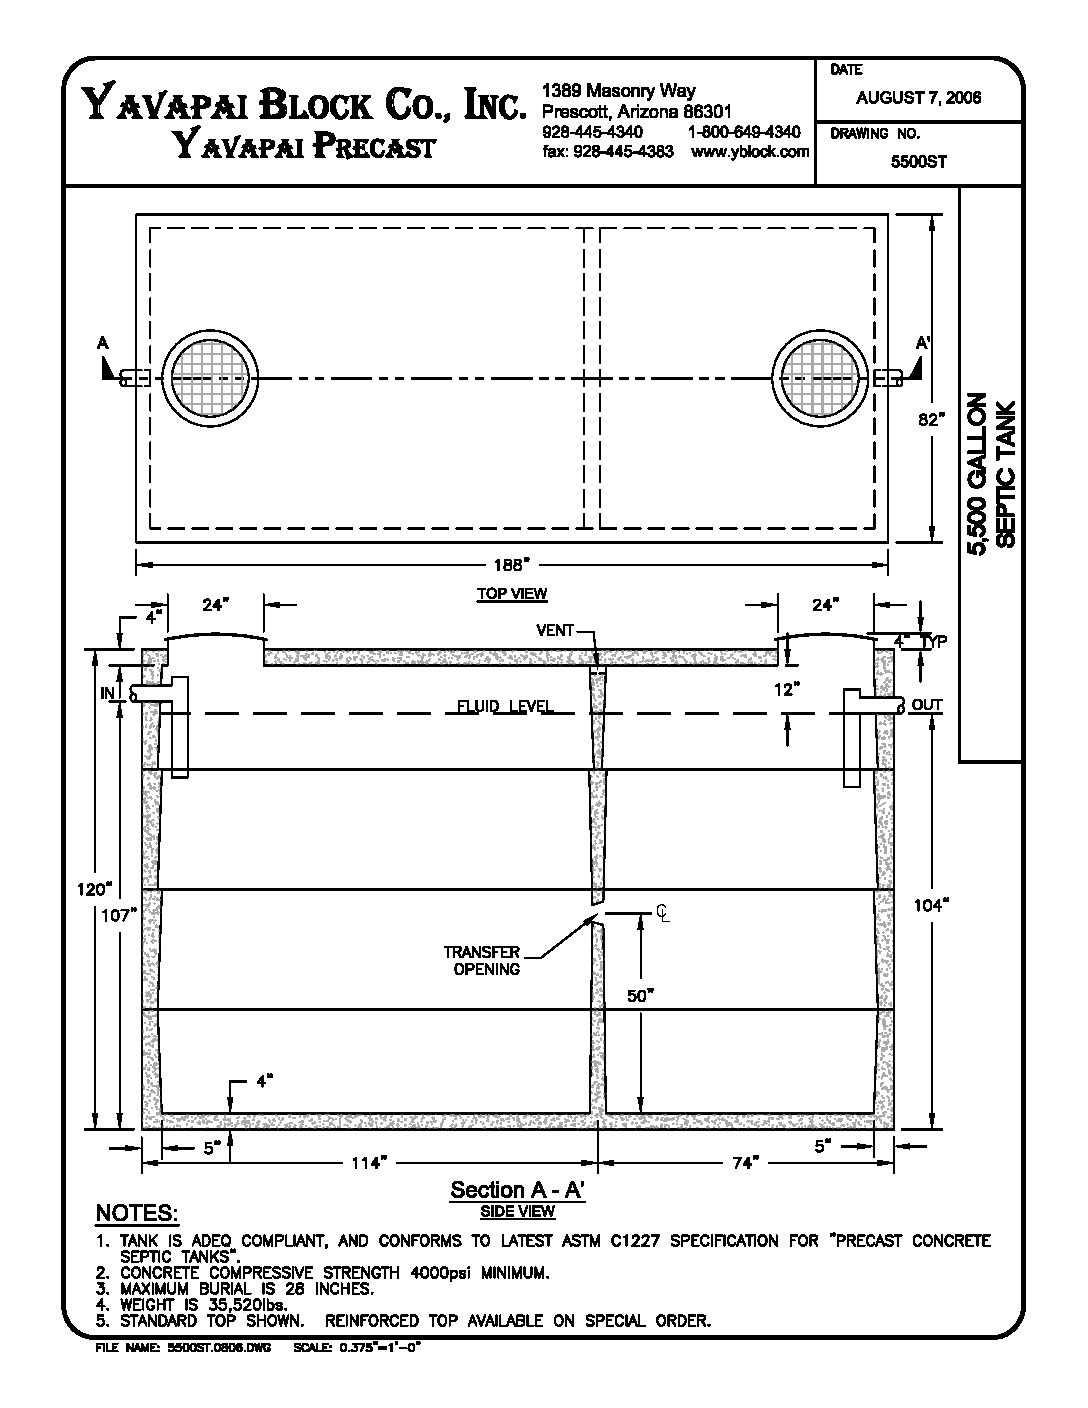
Septic Tank Drawings
Septic Tank Frequently Asked Questions
Where is my septic tank located in my yard?
Find the sewer cleanout on the building. It should be next to the foundation. If there is a double cleanout, line up the two cleanouts, and that points you toward the septic tank. If there is only one cleanout, a line perpendicular to the building at the cleanout should point you toward the septic tank. A septic tank will be a minimum of ten feet from the building but could be as much as twenty or thirty feet. Start looking about fifteen feet from the building on the line from the sewer cleanout. Sometimes a metal detector can detect the rebar in the septic tank making this task much easier.
How deep is my septic tank buried?
Anywhere from six inches to five feet. Most septic tanks are buried between one and two feet.
How often do I have my septic tank pumped out?
This depends on the size of the tank and how many people are using it, not on the size of the building or how many bathrooms you have. See our pumping frequency chart under do’s and don’t’s.
Do septic tank additives really work?
Generally no, they do not help your septic tank.
My septic tank is backing up, what should I do?
First, check your septic tank filter to see if it needs cleaning. If the filter appears to be letting water pass through it, you should call a plumbing contractor to inspect your system and piping.
Where is the filter located?
It is inside the tank on the outlet end of the septic tank. It is connected to the outlet pipe, and filters the water before it goes to the disposal field.
How do I clean a septic tank filter?
Locate the access cover on the outlet end of the tank and remove it. This cover is on the top of the tank. The filter is under this cover and has a handle on the top it. Grab the handle and pull straight up until the filter is free. Use a garden hose and wash off the filter making sure the dirty water falls back into the septic tank Once the filter is clean, reinstall it and replace the access cover. Tip: Some septic tank filters are directional and will have an arrow and the word “OUTLET” on the top. The arrow should be pointed toward the outlet or disposal field. Failure to do this will cause the septic tank to back up.
How often do I clean the septic tank filter?
Filter manufacturers recommend once per year. If your drains seem to be running slow or backing up you should check the filter to see if it needs cleaning. A clogged filter will not let any water out of the septic tank causing a backup. Check those filters!
If I add on to my house, is the septic tank big enough?
Probably not, you will need to check with your county health department for sizing requirements.
Can I drive a vehicle over the top of my septic tank?
NO! Never drive over the top of any septic tank, it could collapse under the weight of the vehicle.
How to Install Precast Concrete Septic Tanks?
Concrete septic tanks are a very durable product when installed properly. An improperly installed tank may not only create immediate problems before the job is even completed but may have long-term consequences that others will pay for later.
The following installation instructions must be followed to ensure that the tank is not damaged and the end-user receives a quality system.
Septic Tank Excavation:
- The length and width of the excavation should be dug a minimum of one foot bigger than the septic tank around all sides (measured at the bottom of the hole).
- The depth of the hole should be over-dug 4 inches to 6 inches below the tank bottom elevation to allow for bedding material. All loose material should be removed or compacted. If large boulders are encountered and removed, the hole left by the boulder should be filled and compacted.
Septic Tank Bedding:
- Acceptable bedding materials: sand, pea-gravel, ¾ inch or less gravel or cinders, screened decomposed granite. Loam, clay, and aggregate base material (ABC) are not acceptable bedding materials.
- Bedding material should be placed 4 to 6 inches thick
- Screed the bedding flat, and level to within ½ inch each way.
- For 1500-gallon tanks and smaller; screed the surface of the bedding with a straight-edge tool that is longer than the width of the tank down the length of the hole, and then screed the other direction with a straight-edge tool that is longer than the length of the tank. Repeat this process as many times as is necessary to ensure that the surface of the bedding is flat and level as noted above. The following instructions for 1700-gallon tanks or bigger is a more ideal screeding method and may also be used.
- For 1700 gallon tanks and bigger; set straight screed rails down both of the long sides of the excavation as close to the side wall as possible. Make sure that the rails are set level and checked for level across the hole at both ends of the screed rails. Screed rails should be firmly affixed to wooden or metal form stakes. The screed rails should be at least 8 inches from where the side wall of the tank will rest. Place the bedding material into the hole and screed across the top of the screed rails with a straight-edge tool. The area where the tank will rest should now be perfectly flat and level. Pull out the screed rails and fill the void created by the rails with bedding material.
Septic Tank Back-filling and water-testing:
- Back-fill materials should be the same as the bedding materials noted above but with a few other alternatives. Aggregate base material (ABC) and most native soils (except clay) may also be used for back-fill. All back-fill materials should be less than 3 inches in diameter. Native soils and ABC should be compacted with a plate compactor ( the size of the excavation may have to be enlarged to accommodate this process ). Do not water-settle the back-fill around the tank and do not use mud to fill around the tank.
- On any tank larger than 2500 gallons, back-fill evenly to 4 to 6 inches below the first joint. Fill with water for leak-testing the tank to 4 to 6 inches above the joint. If no water leakage is detected repeat this process until the tank is completely water-tested and completely back-filled.
- 2500 gallon tanks and smaller may be water-tested without the support of back-fill if the tank is to be back-filled within 12 hours of placing water in the tank.
- If a leak is discovered, back-filling and water-testing should be halted, and Yavapai Precast notified of the problem immediately.
General conditions:
- The excavation should not have water in it unless the water is clear enough to be able to determine that the bedding material has not been damaged and that no rocks or sloughing has fallen on top of the bedded area where the tank is to be placed.
- The job site and tank setting location must be accessible for our trucks without towing or pushing of the vehicle or other equipment.
- Stand-by time as a result of improper hole preparation or site accessibility will be charged at the current dollar per hour rate.
- The customer is responsible for all excavation, back-filling, and testing of tanks.
- Any product of our manufacture, not installed according to the above instructions, handled, moved, or installed by others nullifies the responsibility of Yavapai Precast.
- Do not drive over the top of the tank at any time.
Septic Tank Hole Size for Installation
| Tank Size | Hole Size for Installation |
||
| Depth |
Width |
Length |
|
| 1000 Gallon | 6’2″ | 7’6″ | 10’0″ |
| 1250 Gallon | 6’2″ | 7’6″ | 12’6″ |
| 1500 Gallon |
6’2″ | 8’0″ | 13’0″ |
| 1700 Gallon |
6’2″ | 8’0″ | 14’0″ |
| 2000 Gallon | 7’0″ | 8’0″ | 14’0″ |
| 2500 Gallon |
6’0″ | 9’0″ | 18’0″ |
| 4000 Gallon |
8’4″ | 9’0″ | 18’0″ |
| 5500 Gallon | 10’8″ | 9’0″ | 18’0″ |
Septic Tank Do’s and Don’ts
Things to Do
Things Not to Do
View All Precast Products
If you’re in need of precast concrete on your next project, we’ve got everything from standard CMUs to manholes, parking bumpers, and highway barriers.

